
The 1978 Chevy Corvette is a beloved classic, known for its powerful V8 engine, sleek body design, and unmistakable presence on the road. But like any older vehicle, it requires proactive maintenance to keep it running smoothly. One common issue owners face is transmission fluid leaks—often caused by a worn or damaged transmission pan gasket. Replacing this gasket is a straightforward job for DIY enthusiasts and can prevent major transmission damage down the road. In this guide, we will walk you through how to replace the transmission gasket on a 1978 Corvette Chevy safely and correctly.
How to Change a 1978 Corvette Chevy’s Transmission Gasket
Why the Transmission Gasket Matters
The transmission pan gasket forms a seal between the transmission housing and the transmission pan. On older vehicles like the 1978 Corvette (which typically came equipped with the TH350 or TH400 automatic transmission), these gasket can dry out, crack, or deform after years of heat exposure. Once the gasket fails, fluid leaks begin, which can cause:
- Low transmission fluid levels
- Overheating
- Harsh shifting
- Transmission slippage
- Long-term component wear
Replacing the gasket stops the leak, preserves internal components, and ensures smooth operation.
Tools and Supplies You’ll Need
Before you begin, gather the following tools:
- New transmission pan gasket (cork or rubber)
- Transmission filter kit (recommended)
- Transmission fluid (Dexron III or compatible)
- Socket wrench set
- Drain pan
- Scraper or gasket remover
- Brake cleaner
- Torque wrench
- Clean shop rags
- Jack and jack stands or lift
Step-by-Step Guide to Replacing the Transmission Gasket
1. Safely Raise the Corvette
First, park on flat terrain and apply the parking brake. Use a hydraulic jack to lift the front of the car, then place jack stands under the frame for safety. A lift is ideal if available, especially given the C3 Corvette’s low stance.
2. Drain the Transmission Fluid
Place a drain pan under the transmission. The 1978 Corvette’s transmission does not have a drain plug on the pan, so you will need to loosen the pan bolts slowly. Start by loosening one corner so fluid flows out gradually. This process can be messy—patience is key.
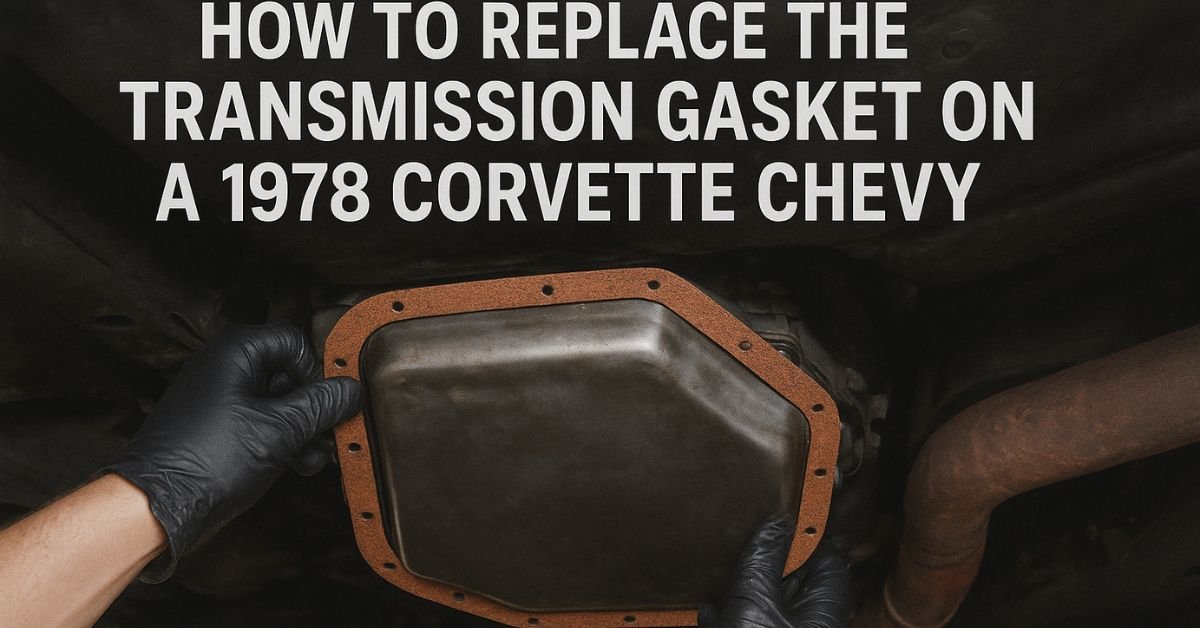
3. Remove the Transmission Pan
Once most fluid has drained, remove all bolts and carefully lower the pan. You may still have residual fluid inside, so keep the pan level until you empty it into the drain pan.
4. Replace the Transmission Filter (Highly Recommended)
Most Corvette owners replace the filter any time the pan gasket is removed. Remove the old filter, install the new one from the kit, and make sure the rubber O-ring seats correctly.
5. Clean the Pan and Transmission Surface
A clean surface is crucial for a leak-free seal. Scrape off old gasket material from both the transmission pan and case. Then, use brake cleaner to remove oil residue. The pan’s magnet should also be cleaned—it collects fine metal particles from normal wear.
6. Install the New Gasket
Place the new gasket on the pan. Some gaskets come with adhesive backing, but if yours doesn’t, you can use a small amount of RTV to hold it in place—do not overuse RTV, as excess can break loose and contaminate the transmission.
7. Reattach the Transmission Pan
Position the pan back onto the transmission. Hand-thread all bolts first to avoid cross-threading. Then use a torque wrench to tighten the bolts to factory specifications—typically 10–12 ft-lbs for the TH350/TH400. Over-tightening can distort the pan and cause leaks.
8. Refill the Transmission Fluid
Lower the Corvette from the jack stands. Add the recommended amount of Dexron III fluid through the dipstick tube. Start the engine, let it warm up, and cycle through all gears. Check the fluid level again and top off as needed.
Final Checks
Inspect the pan area for leaks while the engine is running. Take a short test drive and check again. If everything is dry, the repair was successful.
Conclusion
Replacing the transmission pan gasket on a 1978 Corvette Chevy is a practical DIY project that can save you money and protect your classic car from avoidable transmission issues. With the right tools, some patience, and attention to detail, you can complete the job confidently and enjoy smooth, leak-free shifting for miles to come.