
The braking system is one of the most important safety features on any motorcycle, especially on classic models like the 1980 Suzuki GS750. Over time, rubber brake lines can crack, swell, or weaken, reducing braking performance and increasing the risk of failure. If your GS750 still has its original brake hoses, replacing them is not only a smart upgrade but also an essential maintenance task. In this guide, we’ll walk you through the complete process of replacing the front brake line safely and correctly.
How to Replace the Front Brake Line on a 1980 Suzuki GS750
Why Replace the Front Brake Line?
The factory-installed brake lines on older motorcycles were made from rubber, which deteriorates over time. After decades of use, these lines may:
- Develop internal blockages
- Swell under pressure
- Leak brake fluid
- Reduce braking responsiveness
Upgrading to a new rubber line or a stainless steel braided hose improves brake feel, reliability, and safety. Many GS750 owners choose braided lines for better performance and longer lifespan.
Tools and Materials You’ll Need
Before starting, gather the following items:
- Replacement brake line (OEM or braided stainless steel)
- Check your handbook for DOT 3 or DOT 4 brake fluid.
- Wrenches (10mm and 12mm commonly used)
- Brake bleeding kit or clear tubing
- Catch bottle for old fluid
- Clean rags or paper towels
- Protective gloves
- Torque wrench (optional but recommended)
Brake fluid can damage paint and plastics, so always work carefully and keep rags nearby.
Step 1: Prepare Your Motorcycle
Park your Suzuki GS750 on a flat surface and place it on its center stand or paddock stand. Turn the handlebars straight to keep the master cylinder level. This prevents air from entering the system unnecessarily.
Cover your fuel tank, fairings, and headlight area with cloths to protect them from spilled brake fluid.
Open the front brake fluid reservoir and remove the cap and rubber diaphragm. This allows the system to release pressure during disassembly.
Step 2: Drain the Old Brake Fluid
Attach a clear tube to the brake caliper bleed valve and place the other end in a container. Use a wrench to slightly open the bleed screw.
Slowly squeeze the brake lever several times to push old fluid out of the system. Continue until most of the fluid has drained. Tighten the bleed screw once finished.
Dispose of used brake fluid responsibly according to local regulations.
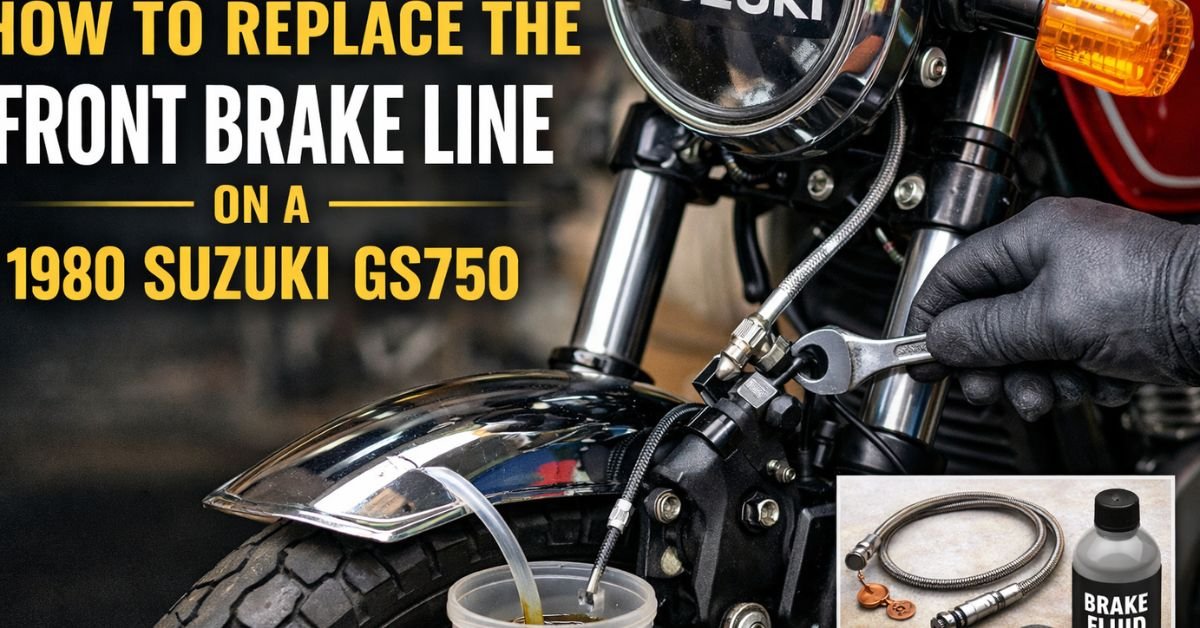
Step 3: Remove the Old Brake Line
Using the correct wrench size, loosen the banjo bolt at the master cylinder first. Place a rag underneath to catch any remaining fluid.
Next, loosen the banjo bolt at the brake caliper. Carefully remove the old brake hose and any mounting clips or brackets holding it in place.
Inspect the banjo bolts and washers. In most cases, you should replace the copper crush washers with new ones to ensure a proper seal.
Step 4: Install the New Brake Line
The new brake line should be routed in the same manner as the original hose. Make sure it does not rub against sharp edges, suspension components, or hot engine parts.
Install new copper washers on each side of the banjo fitting. Then attach the brake line to the master cylinder and caliper using the banjo bolts.
Hand-tighten both ends first, then torque them to the manufacturer’s recommended specification (usually around 15–25 ft-lbs, but confirm for your model).
Do not overtighten, as this can damage threads or fittings.
Must Read: How to Convert a DOT 5 Brake System to DOT 4?
Step 5: Refill the Brake System
Pour fresh DOT brake fluid into the master cylinder reservoir. Avoid mixing different fluid types unless they are compatible.
Slowly pump the brake lever several times to move fluid through the new line. Keep an eye on the fluid level and do not let it run dry, as this will introduce air into the system.
Step 6: Bleed the Brakes
Proper bleeding is critical for firm braking performance.
- Attach the clear tube to the caliper bleed valve.
- Pump the brake lever 3–4 times and hold it.
- Air and liquids can be released by momentarily opening the bleed screw.
- Close the screw before releasing the lever.
- Repeat until no air bubbles appear.
Continue this process while keeping the reservoir filled. When finished, the brake lever should feel firm and responsive.
Step 7: Final Inspection and Testing
Reinstall the reservoir diaphragm and cap securely. Clean any spilled brake fluid with water and a soft cloth.
Check for leaks at both banjo connections. Gently squeeze the brake lever and inspect for seepage.
Test the brakes in a secure location at a low speed before riding. Make sure the front brake engages smoothly and consistently.
Maintenance Tips for Your GS750 Braking System
To keep your braking system in good condition:
- Replace brake fluid every 1–2 years
- Inspect hoses regularly for cracks or wear
- Clean calipers and pistons periodically
- Use quality brake components
These small steps will help preserve braking performance and extend the life of your classic Suzuki.
Conclusion
Replacing the front brake line on a 1980 Suzuki GS750 is a manageable task for most motorcycle enthusiasts with basic tools and patience. By installing a new hose and properly bleeding the system, you’ll improve braking response, safety, and overall riding confidence.
Whether you’re restoring a vintage GS750 or maintaining a daily rider, keeping the brake system in top condition is essential. With careful work and attention to detail, this upgrade will reward you with reliable performance for years to come.