
The center console is an important part of many vehicles. It provides storage space, houses cup holders, and may contain controls for the gear selector, parking brake, infotainment system, USB ports, or other electrical components. Over time, you may need to remove the center console to repair wiring, replace a damaged component, access the carpet, install aftermarket equipment, or fix a rattling noise.
How to Remove a Center Console: A Step-by-Step Guide
Removing a center console is usually not extremely difficult, but the exact procedure varies from one vehicle to another. Some consoles are held in place with screws and bolts, while others also use clips and electrical connectors. Taking your time and keeping track of the hardware can make the job much easier.
What You Need Before You Start
Before removing the center console, gather a few basic tools. Depending on your vehicle, you could require::
- Phillips and flat-head screwdrivers
- A socket set and ratchet
- Torx drivers or bits
- Plastic trim removal tools
- A small flashlight
- A container for screws and clips
- Work gloves
Plastic trim tools are particularly useful because they allow you to remove panels without easily scratching or damaging the surrounding trim.
It is also a good idea to check your vehicle’s service information before beginning. The location of hidden screws, clips, and electrical connectors can vary considerably between makes and models.
Step 1: Park the Vehicle Safely
Park the vehicle on a level surface and switch off the engine. Set the parking brake and make sure the vehicle is secure before starting work.
If you will be disconnecting electrical connectors underneath the console, consider disconnecting the negative battery cable if the vehicle manufacturer’s service instructions recommend it. Some vehicles contain airbag-related wiring or other sensitive electrical systems, so always follow the manufacturer’s precautions.
Step 2: Remove Items From the Console
Empty everything from the center console before attempting to remove it. Take out coins, storage items, floor mats, and anything else that could get in the way.
Check inside the console storage compartment and cup holders. Some vehicles hide screws underneath rubber mats, felt liners, or removable storage trays. Carefully lift these pieces and look for fasteners.
Step 3: Remove the Surrounding Trim
The next step is usually removing the trim around the center console. This might include a gear-shifter trim panel, cup-holder surround, small storage tray, or other decorative panels.
Use a plastic trim removal tool to gently release the clips. Work slowly around the edges rather than forcing one section upward.
If a panel does not come loose easily, stop and look for a hidden screw or clip. Applying excessive force can break plastic clips or damage the trim.
Step 4: Locate and Remove the Fasteners
Once the surrounding trim has been removed, look for the screws or bolts securing the center console to the vehicle.
Fasteners may be located:
- Inside the storage compartment
- Under removable mats
- Near the front of the console
- Near the rear passenger area
- Along the sides of the console
- Beneath small plastic covers
Remove each fastener carefully and keep the screws organized. A simple way to stay organized is to place hardware from each section into a small labeled container.
Step 5: Check for Electrical Connectors
Before lifting the console completely, check underneath it for electrical wiring.
Modern center consoles can contain connectors for USB ports, power outlets, heated seats, electronic parking brakes, drive-mode controls, ambient lighting, shifter systems, and other equipment.
Do not pull on the wires. Instead, locate the connector locking mechanism and disconnect it according to its design.
Take a quick photo of the connectors before disconnecting them. This can make reassembly easier, especially if several connectors look similar.
Step 6: Lift the Center Console Carefully
After removing the fasteners and disconnecting the necessary connectors, gently lift the center console.
Do not immediately pull it away from the vehicle. Look around the entire console for any remaining clips, screws, or wiring.
If the console moves but will not come out, something is probably still attached. Find the obstruction rather than forcing the console.
Depending on the vehicle, you may need to move the seats forward or backward to create enough room. You may also need to position the gear selector appropriately, but follow the vehicle manufacturer’s instructions when doing so.
Must Read: Will a GMRS Radio Overheat in the Center Console?
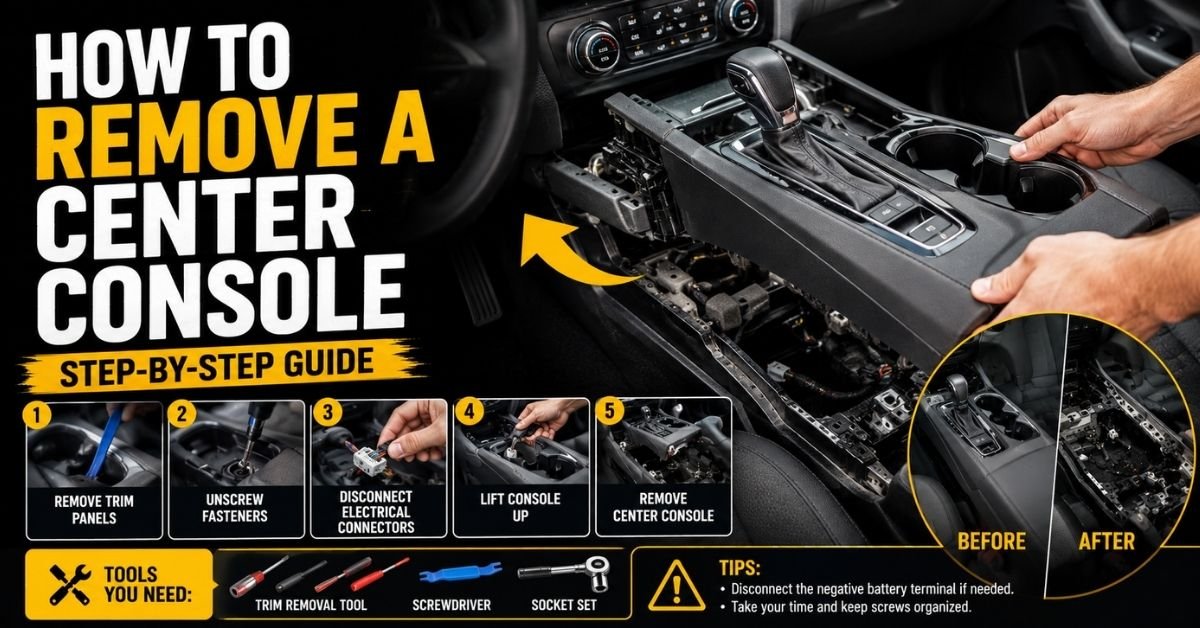
Step 7: Inspect the Area
Once the center console is removed, you will have access to the area underneath it. This can be useful when repairing wiring, replacing damaged trim, addressing loose components, cleaning the carpet, or installing aftermarket equipment.
Before doing any electrical work, make sure the power is disconnected as required by the vehicle manufacturer’s instructions.
How to Reinstall the Center Console
Reinstalling the center console is essentially the reverse of removal. Position the console correctly and make sure all wiring is routed properly.
Reconnect every electrical connector and make sure each locking tab is secure. Then reinstall the screws and bolts without overtightening them.
Once the console is secured, reinstall the surrounding trim panels. Press the panels gently into place until their clips engage.
Finally, reconnect the battery if it was disconnected and test the functions associated with the console. Check the power outlets, USB ports, switches, shifter-related controls, and other equipment that you disconnected.
Common Mistakes to Avoid
One of the biggest mistakes when removing a center console is using too much force. If a trim panel will not move, there may be a hidden fastener.
Another common mistake is forgetting an electrical connector. Always inspect underneath the console before lifting it completely.
Avoid using metal tools directly against visible plastic trim whenever possible. Plastic trim tools reduce the chance of scratches and damage.
It is also important to keep track of every screw and clip. Missing even one fastener can cause the console to rattle after reinstallation.
Final Thoughts
Learning how to remove a center console can save time when you need access to wiring, carpeting, storage components, or other parts located beneath it. The basic process involves removing surrounding trim, locating hidden fasteners, disconnecting electrical connectors, and carefully lifting the console.
However, every vehicle is different. Before starting, consult the owner’s manual or vehicle-specific service information for the correct removal procedure. Work slowly, avoid forcing plastic components, and carefully document electrical connections. With the right tools and a methodical approach, removing and reinstalling a center console can be a manageable DIY project.